Follow the below steps to proceed with installation requirements for Linux OS.
Table of Contents
Step: Requirement and Installation of Docker Engine & Docker Desktop.
Install Docker Engine
First, we will install the docker engine. To install Docker Engine, you need the 64-bit version of one of these Ubuntu versions, but we need docker desktop as well. So, we prefer the below two ubuntu versions.
- Ubuntu Jammy 22.04 (LTS)
- Ubuntu Impish 21.10
I prefer Ubuntu 22.04 LTS, this post is based on Ubuntu 22.04 LTS. Docker Engine is supported on x86_64 (or amd64), armhf, arm64, and s390x architectures. You can test your architecture using the below command.
uname -m
To get started with Docker Engine on Ubuntu, make sure you meet the prerequisites.
Once you are done with the prerequisites you can install Docker using the given official docker installation link.
Install Docker Desktop
Prerequisites
To install Docker Desktop successfully, you must:
- Meet the system requirements
- Have a 64-bit version of either Ubuntu Jammy Jellyfish 22.04 (LTS) or Ubuntu Impish Indri 21.10. Docker Desktop is supported on
x86_64(oramd64) architecture.
Once you are done with the prerequisites you can install Docker using the given official docker installation link.
One can launch the Docker desktop using a GUI icon or command line.
Using the command line:
$ systemctl --user start docker-desktop
After you’ve successfully installed Docker Desktop, you can check the versions of these binaries by running the following commands:
$ docker compose version
$ docker --version
$ docker version
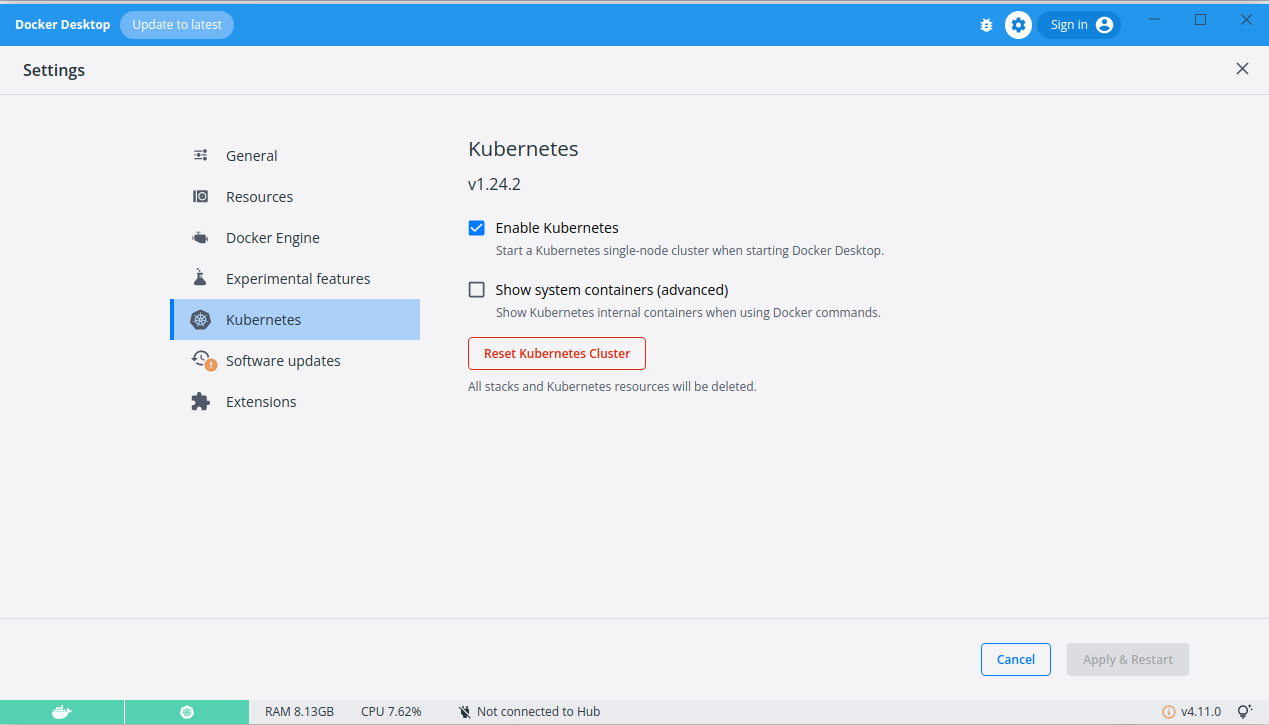
Step: Enable Kubernetes.
After installing docker go to Docker settings and enable Kubernetes. Click on Apply and restart, which will install and Start a Kubernetes single-node cluster when starting Docker Desktop.
Step: Install kubectl on Linux.
kubectl is a Kubernetes command-line tool, kubectl, allows you to run commands against Kubernetes clusters. You can use kubectl to deploy applications, inspect and manage cluster resources, and view logs.
Follow the commands to install kubectl on the official kubectl installation guide.
Note
It is important to install the latest version of kubectl. Using the latest compatible version of kubectl helps avoid unforeseen issues.
Run “kubectl” command in bash shell to check it is installed or not.
$ kubectl version --client
Step: Install HELM on Linux.
What is Helm: Helm helps you manage Kubernetes applications. Helm uses a packaging format called charts. A chart is a collection of files that describe a related set of Kubernetes resources. Helm Charts help you define, install, and upgrade even the most complex Kubernetes application.
Follow the commands to install Helm on the official Helm installation guide.
Run “helm” command in bash shell to check it is installed properly or not.
$ helm version
Step: Install Visual Studio Code.
Download visual studio code and install.
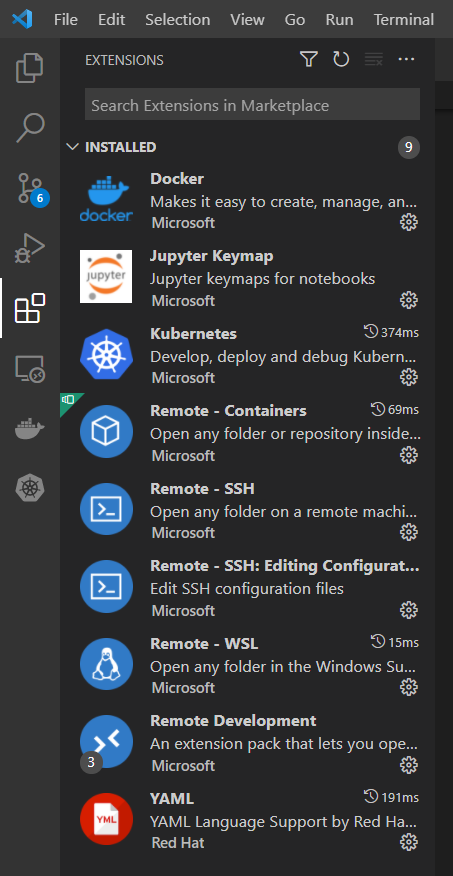
Step: Install Required Visual Studio Extensions
Just Install the various Visual studio code extensions. Visit each web link and you will find the Install button on the web page. Click on the Install button, it will automatically open the Visual Studio Code Software and install the required extension. Repeat the process for all the extensions. You can also install the extensions if you know the names of extensions by launching the Visual studio code.
Note
To make it more simplified, the below weblinks are mentioned.
- Docker
- Kubernetes
- Remote – Containers
- Remote – SSH
- Remote – SSH: Editing Configuration Files
- Remote – WSL
- Remote Development
- YAML
- Pylance
- Python
- Jupyter
- Jupyter Keymap
- Jupyter Notebook Renderers
Once you install all the required extensions, you can check the required extension in the Visual Studio Code