Follow the below steps to proceed with installation requirements for Windows OS.
Table of Contents
Step: Create Windows Restore point.
Please create a Windows restore point, so you can revert to your current Windows configuration/installed software if anything goes wrong with the Docker installation.
Visit this official Microsoft link guide to create Windows Restore Point.
Step: Requirement and Installation of Docker Desktop.
Start with checking your windows version and the windows version required by Docker Desktop: Press Windows key + R: type “winver”
Your Windows machine must meet the following requirements to successfully install Docker Desktop: Install WSL 2 backend
WSL 2 backend requirements
- Windows 11 64-bit: Home or Pro version 21H2 or higher, or Enterprise or Education version 21H2 or higher.
- Windows 10 64-bit: Home or Pro 2004 (build 19041) or higher, or Enterprise or Education 1909 (build 18363) or higher.
- Enable the WSL 2 feature on Windows. For detailed instructions, refer to the Microsoft documentation. You can also follow this link to enable WSL 2 feature which I find handier than Microsoft documentation.
- The following hardware prerequisites are required to successfully run WSL 2 on Windows 10 or Windows 11:
- 64-bit processor with Second Level Address Translation (SLAT)
- 4GB system RAM
- BIOS-level hardware virtualization support must be enabled in the BIOS settings. For more information, see Virtualization.
- Download and install the Linux kernel update package.
Now execute the following command in Powershell
wsl --set-default-version 2
Visit the official Docker website and install the Docker Desktop package based on your Windows version.
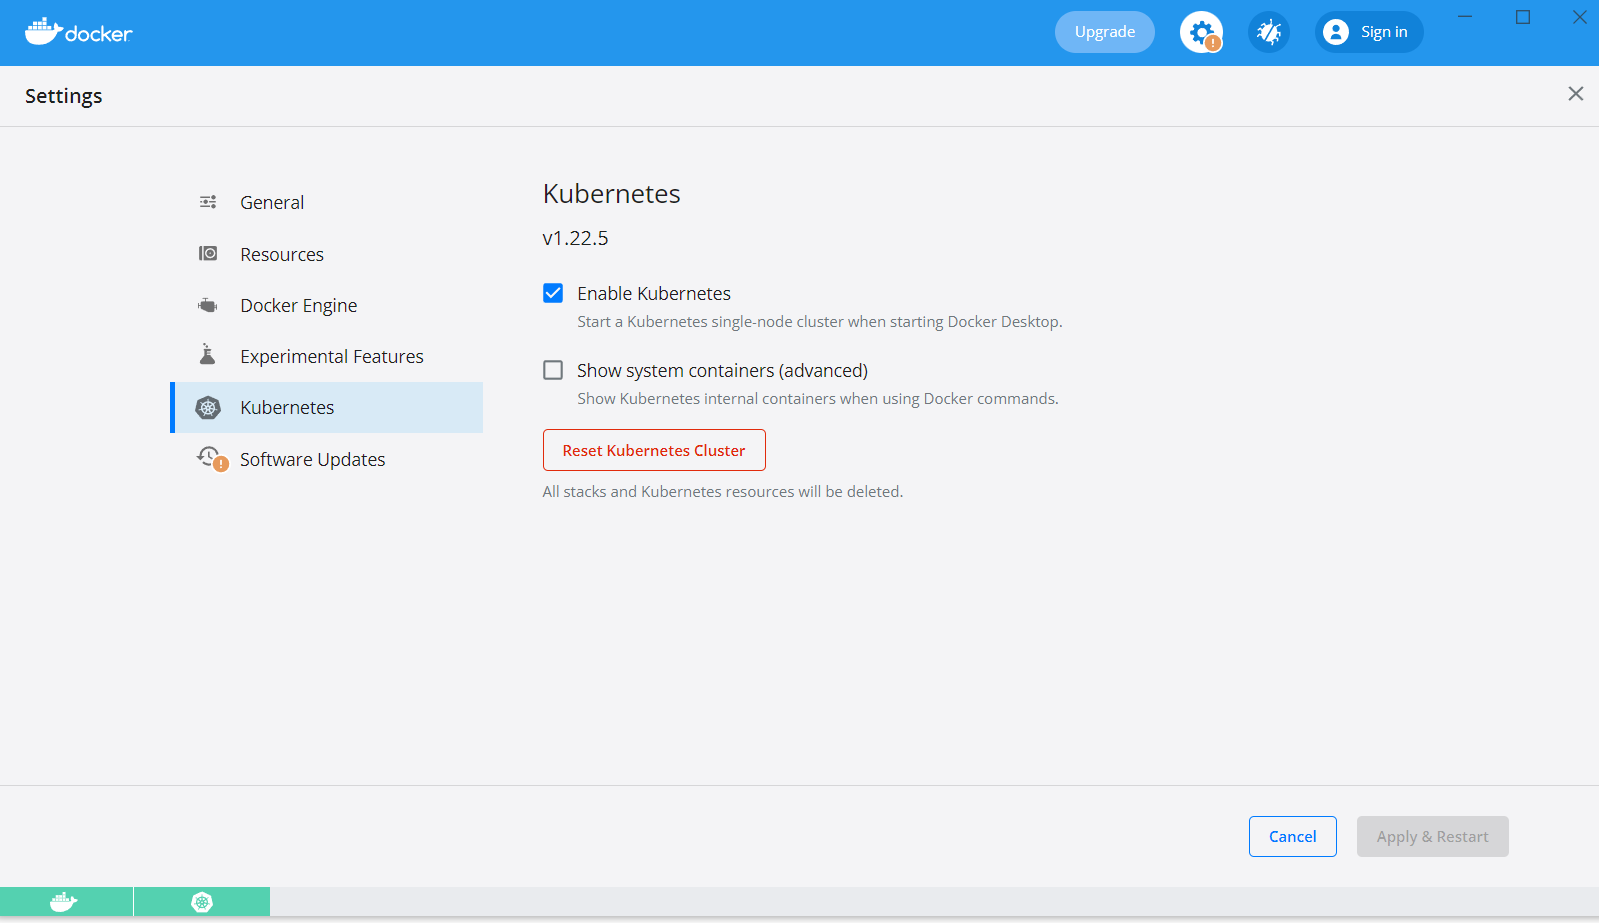
Step: Enable Kubernetes.
After installing docker go to Docker settings and enable Kubernetes. Click on Apply and restart, which will install and Start a Kubernetes single-node cluster when starting Docker Desktop.
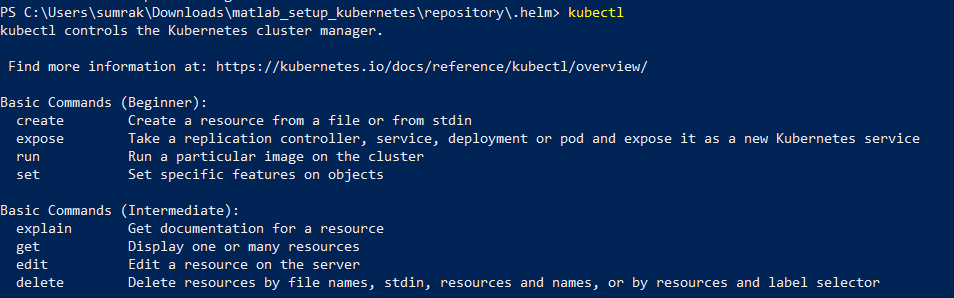
Run “kubectl” command in Powershell to check it is installed or not.
Step: Install HELM on Windows.
- Download the zip file for helm: Windows amd64
- Download and extract the folder “windows-amd64” and place it C:\Users\sumrak\docker
- Set the environment variable:
- Press Windows key + R: type “SystemPropertiesAdvanced.exe”
- Click environment variables: Under System variables, select Path, and then select Edit.
- Select the New button and then add the folder path “C:\Users\sumrak\docker\windows-amd64” where you copied the helm folder to and then press OK.
Note
Replace “sumrak” with your Windows username
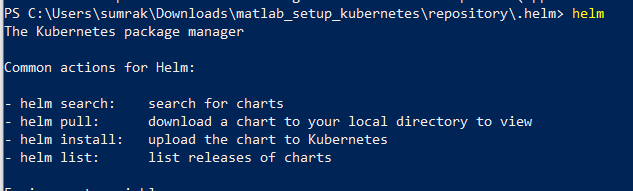
Go to PowerShell and type helm, to check helm command is operational or not.
Step: Install Visual Studio Code.
Download visual studio code and install.
Step: Install Required Visual Studio Extensions
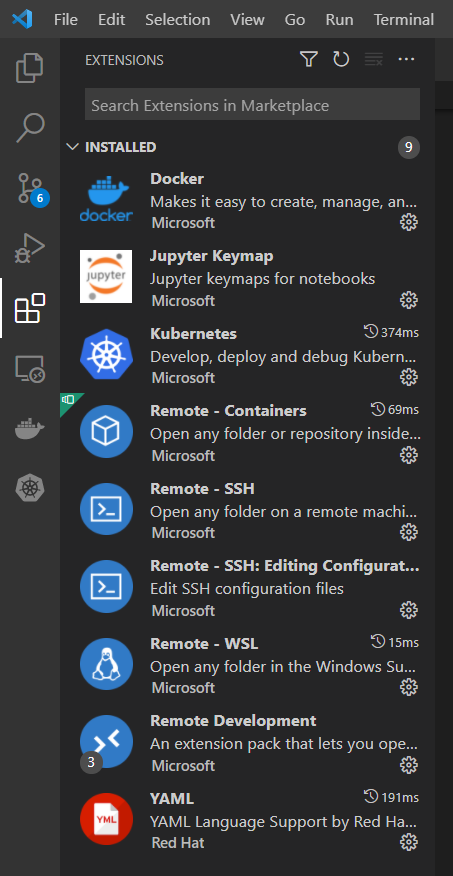
Just Install the various Visual studio code extensions. Visit each web link and you will find the Install button on the web page. Click on the Install button, it will automatically open the Visual Studio Code Software and install the required extension. Repeat the process for all the extensions. You can also install the extensions if you know the names of extensions by launching the Visual studio code.
Note
To make it more simplified, the below weblinks are mentioned.
- Docker
- Kubernetes
- Remote – Containers
- Remote – SSH
- Remote – SSH: Editing Configuration Files
- Remote – WSL
- Remote Development
- YAML
- Pylance
- Python
- Jupyter
- Jupyter Keymap
- Jupyter Notebook Renderers
Once you install all the required extensions, you can check the required extension in the Visual Studio Code
Step: Install Github.
Follow this guide on “How to install git on Windows”.